A PDF version is available here.
It is hard to believe that this marks the end of 10 years of Bridge of the Month. Some months were late and some quite brief but I have managed to post every month for that time.
Figure 1 This tree made me suddenly think about the absence of hugs in my life.
I thought now would be a good time to review where we are and where we are going. It is the end (we hope) if the Covid year. As I write, I am aware that I haven’t given or received more than a handful of hugs in eight months. I coped remarkably well with the loneliness while I could get out on my bike, but once my hand was broken in late September things began to drag a bit and I was conscious of just not getting stuff done. Despite that, I am also very aware of how lucky I am to have work that I love and think of as more than a hobby. Twenty years on from leaving the academic world I still take every opportunity I can to interact with students. I feel I have a lot to give yet.
What is so striking about my life, though, is how much I am still learning. Much of what goes in here is stuff I have noticed for the first time. I am proud that Hamish, too, is anxious to find new and better ways of doing things and to hope to make enough money for that to remain viable. This month, there is a new technology that is likely to prove transformational in the world of masonry bridge inspection.
So, here we go with a look at what is coming. Leica have recently introduced a series of black instruments they call BLK. There is a small-scale tripod scanner and one that you can literally carry around and scan as you go, but the latest is in a different league so far as we are concerned. The first two are still £40k devices. The BLK3D is a £4k device and is, in our view, appropriate technology.
The BLK3D is a little larger than a smartphone. (In fact it runs Android, which means the same device could be used for field data collection.) It has a pair of cameras in diagonally opposite corners in a stiff frame. These are calibrated for angle and distance to provide a binocular (stereo) image, processed on the device so measurements can be taken. They work at more than adequate accuracy for masonry bridge surveys.
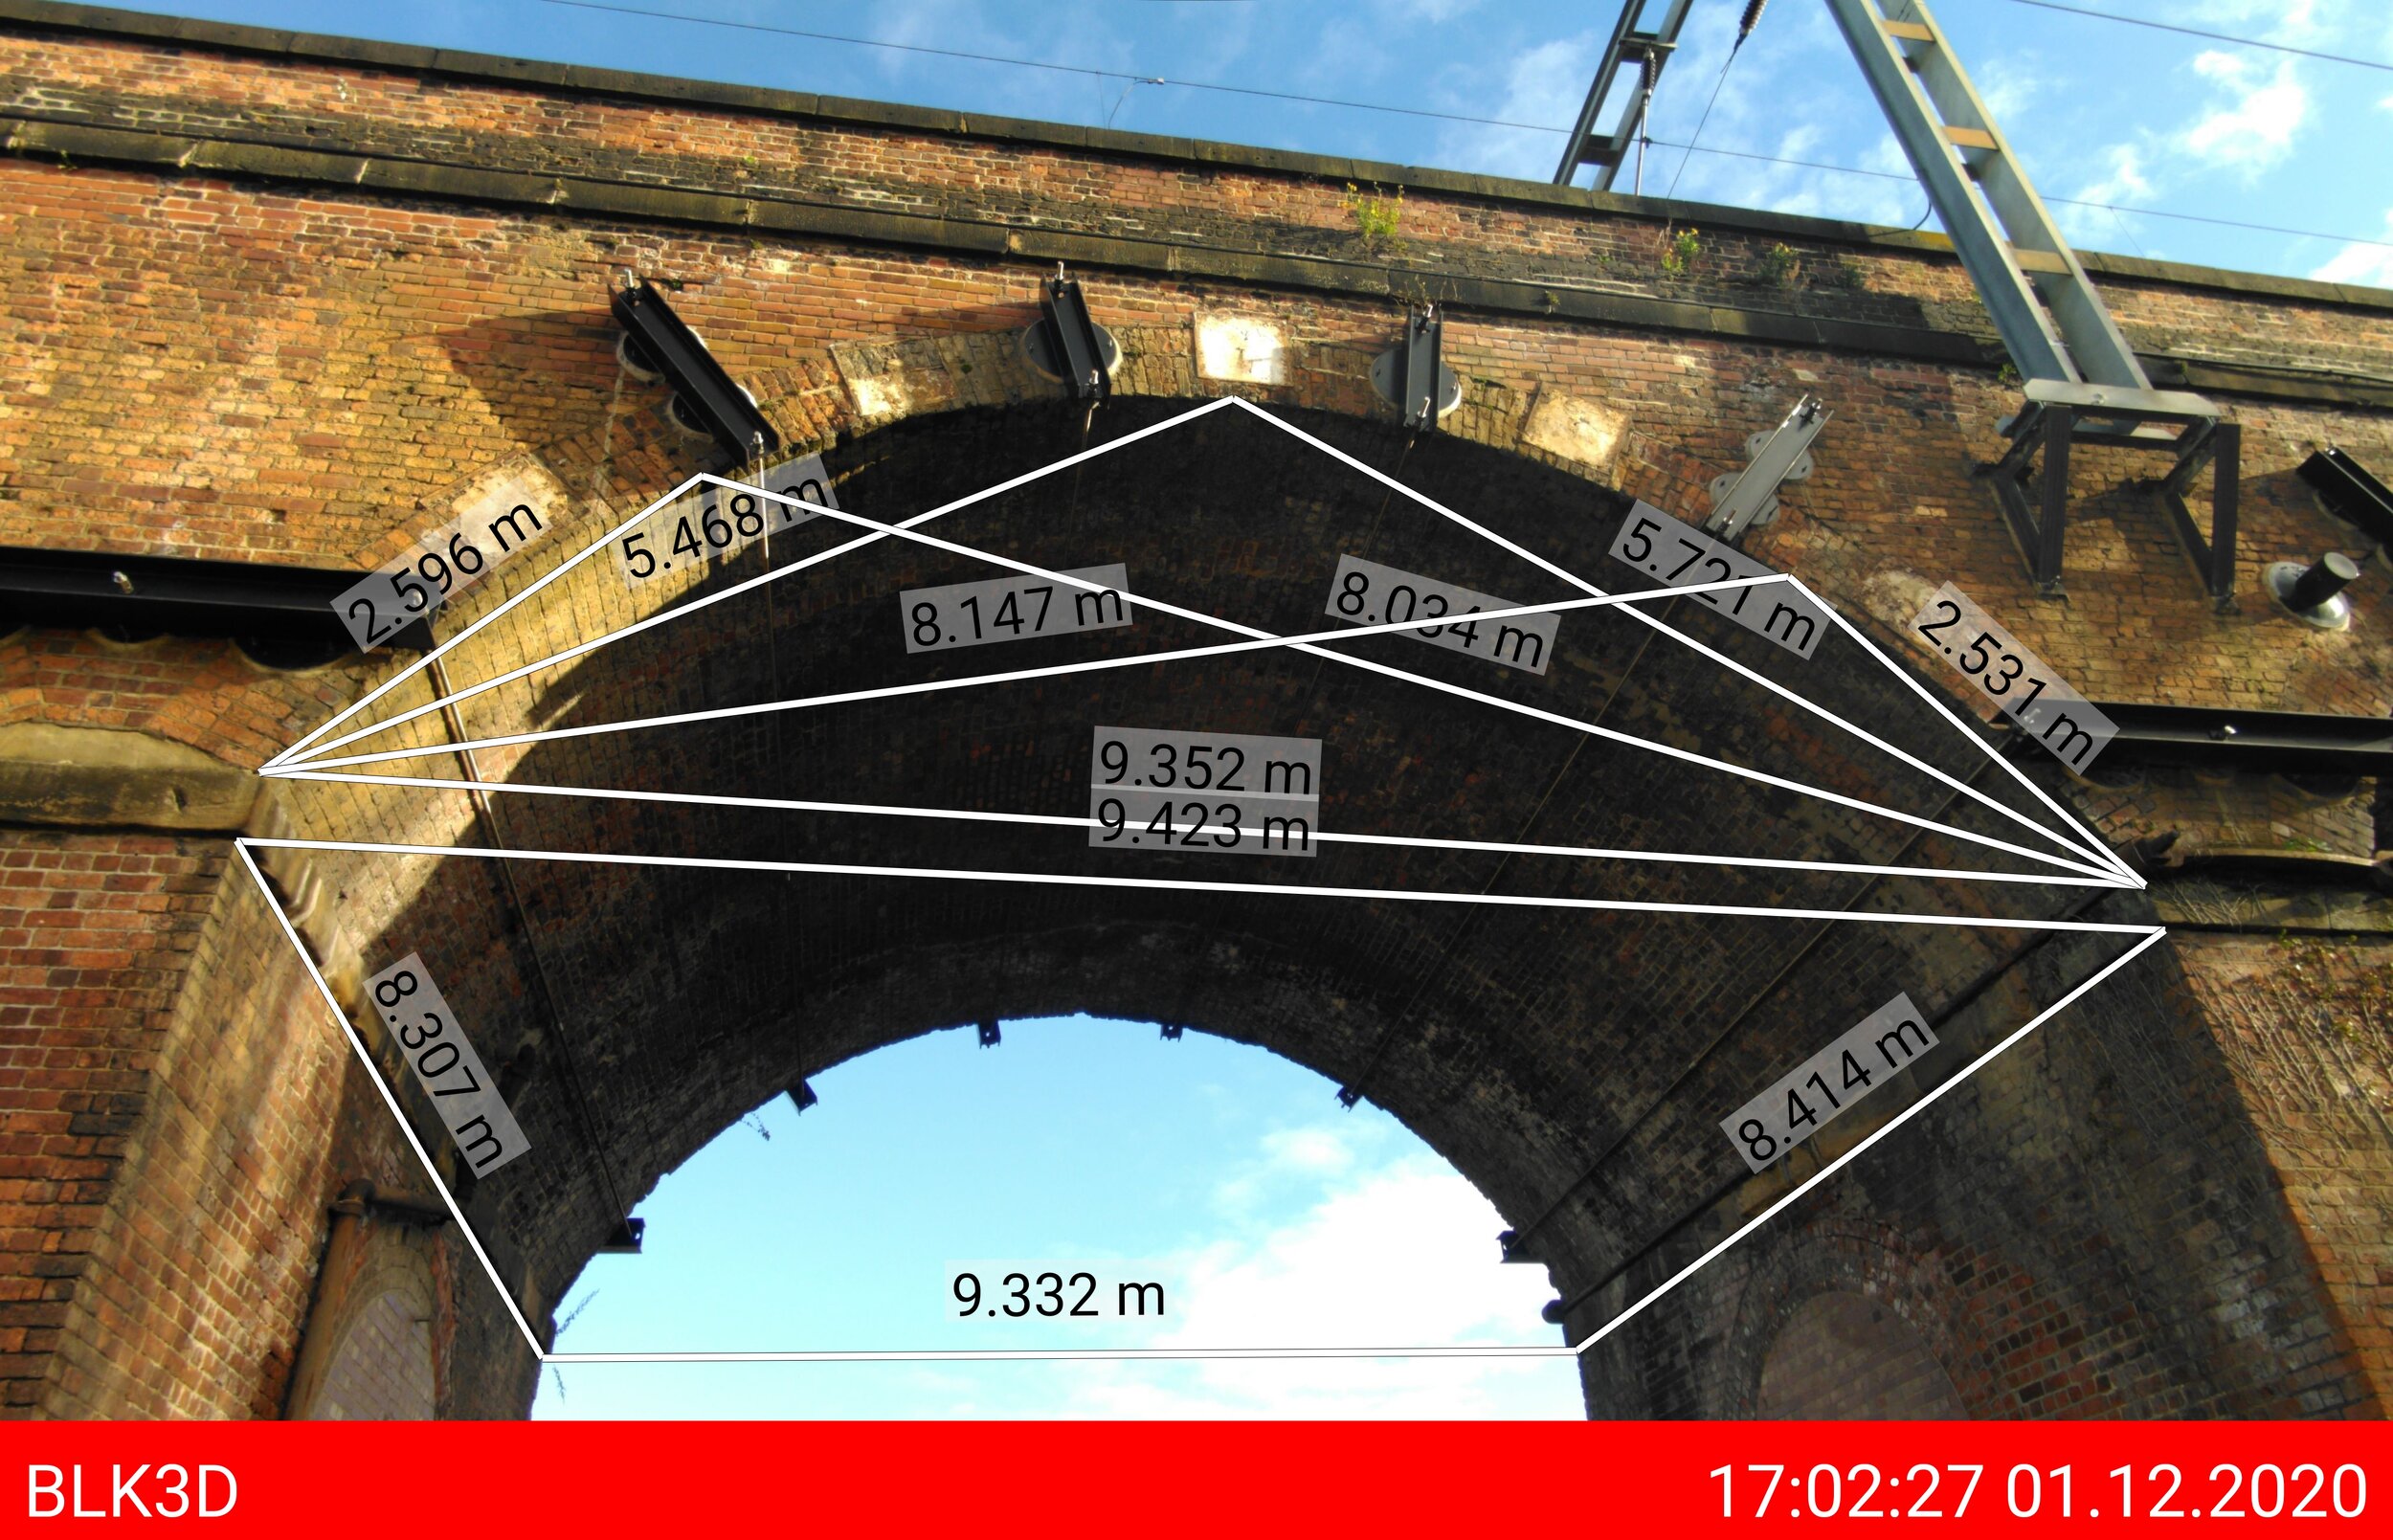
I was doubtful about this measured span from first use at a viaduct in Wakefield.
31 feet seemed unlikely but the Disto produced exactly the same value, and this is measured about 6m above the ground. That’s a photo of the BLK3D screen it is also possible to store multiple measurements and download the image.
The slope measures allow us to calculate the radius from:
Archie-M will do that for you if you select Two Tape method of measurement.
Here I have converted dimensions to feet and rounded, seeking sensible numbers where possible.
The best fit seems to be 31ft span, 16.5ft radius and 140 degrees included angle and I would be happy to run with those numbers as input to Archie.
The rest of the dimensions in the next two pictures show the extent and power of this little device.
But there’s more we can do. RealityCapture recently added support for the device, and can take the stereo pairs along with tilt data from the BLK3D, and use the extra information to scale and level models.
There is a disused railway just round the corner from Hamish and a bridge crosses it here. Hamish spent 20 minutes with the BLK3D. Less than 30 minutes of processing produced a model which can be viewed readily on Sketchfab. The resolution is much less than we usually produce but is still useful. Indeed far more useful than the definition available from a typical laser scan.
Putting that model into our viewer (soon to be released as Reveal4D we think) lets us do all sorts of things with it.
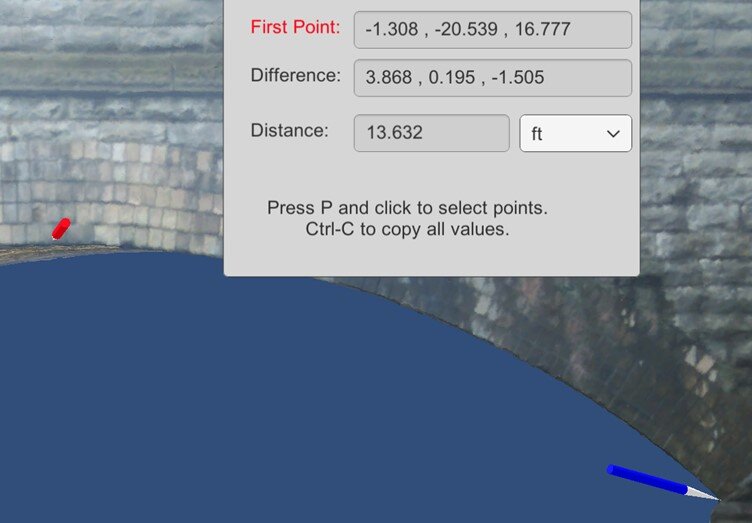
First, we can measure the span:
Notice we have x,y,z difference. The z is negligible, but the y is not so the points I have picked are not quite on the axes. I can choose to measure in feet or m and feet are always more interesting with masonry bridges.
If I drag the red pencil to the crown, the z gives us the rise of the arch.
Though the overall distance is in feet, the x,y,z are not. This will be fixed soon. We can copy the measurements to the clipboard so we can paste them into Excel. Here, the difference row does land as feet.
-1.308 -20.539 16.777 12.691 0.64 -4.937 13.632
Obviously this was built with a 5ft rise and I would expect the square span to then be 25ft. What is the skew? In time we’ll add tools for measuring angles. But we can get there quickly enough without them.
We can add a 2-point vertical plane (the two points define the direction). In the first instance, parallel to the face.
Notice how there is a patch above the crown and slightly left, where the plane creates no white contours. This area is well above the camera positions, and we need to be careful about interpretation, but this is almost certainly a bulge in the masonry, and one that would not be detected in a hands touch survey.
Here, the contours show the abutment face to be flat.
We can extract values for these planes from the model and paste them into excel to measure the skew.
So the bridge has a skew of 6 degrees.
We can drag those planes to the opposite face and that shows the other spandrel and other abutment to be parallel. Copying out the details of those two planes we find a more precise value for the span.
Measured directly, the smallest span was 25.5ft so perhaps these dims aren’t perfect. They are, though as good (if not better) than most bridge dims I see.
So that is with just the BLK3D. However, RealityCapture can use that as a base to scale and level a model using more detailed photos. A further ten minutes with a quality camera produced 101 photos which we built into the model. The day was dull and the photos not as close as we would normally do but the improvement is worthwhile.


